The limitations and challenges in our living room are becoming a theme. Outlets around our house are placed sporadically and the happy receptacles often land squarely behind furniture. Without moving furniture each time we want to find an outlet, our flailing plug-in efforts are about as graceful as a T-Rex at the sit-and-reach.
To forego the hunt for the elusive couch-outlet, extenders can be purchased online for a reasonable price. These are glorified powers strips that can be mounted in a shelf, desk, or other easily-accessible surface. Friends of ours had a similar problem in their cozy living room and the following project is a riff on their solution.
The project boils down to this:
- Create a three sided frame that sits between the wall and the back of the couch.
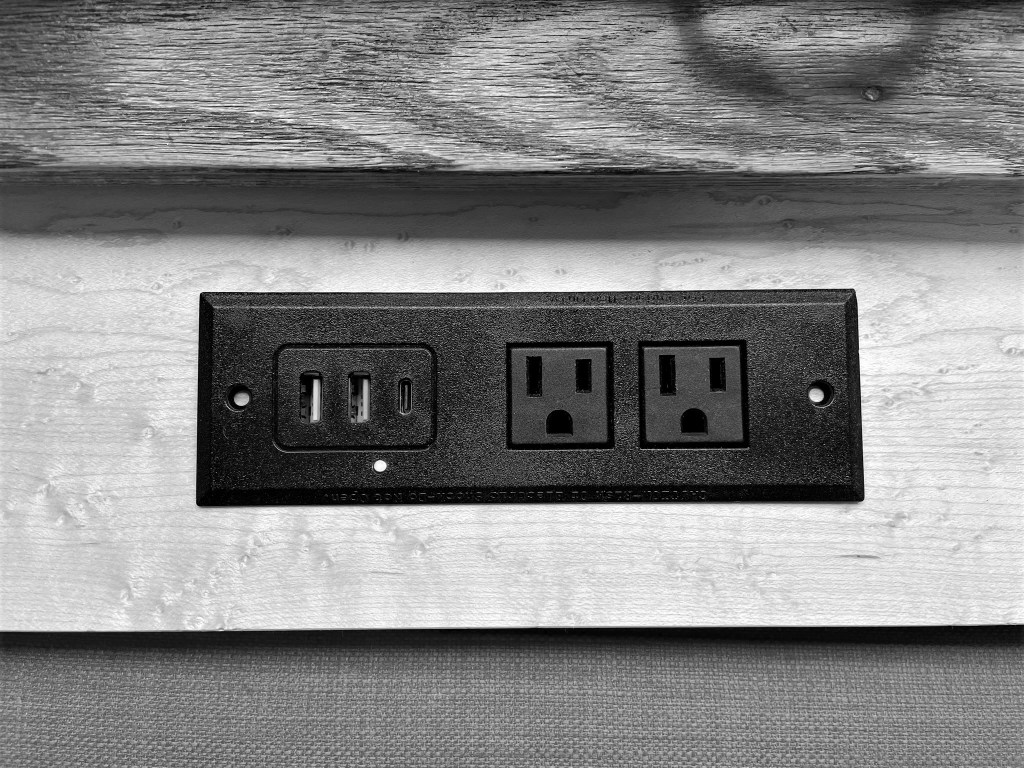
- Create holes in the top of the frame to accept the outlet extenders.
- Plug into the wall and reposition the couch.
- Veg out.
If only it was that simple.
The shelf is constructed in two pieces: an interior structural frame made from 2 x 4 lumber and an exterior maple shell to hold the outlet extenders and hide the frame.
I started with the frame. I chose to use standard 2 x4 lumber. I could have used smaller pieces, but I wanted a beefy and rigid frame to secure warped lumber used in the decorative shell. More on that later. Lumber quality and selection have declined over the past couple years, so I took my time sorting through the pile to select straight and relatively knot-free pieces. I only needed four pieces, so it didn’t take too long. To facilitate easier joinery layout, I like to rip 1/4″ from the short sides of each 2 x 4 to remove the typical round over. I’m left with 1 1/2″ x 3″ pieces, a convenient ratio.
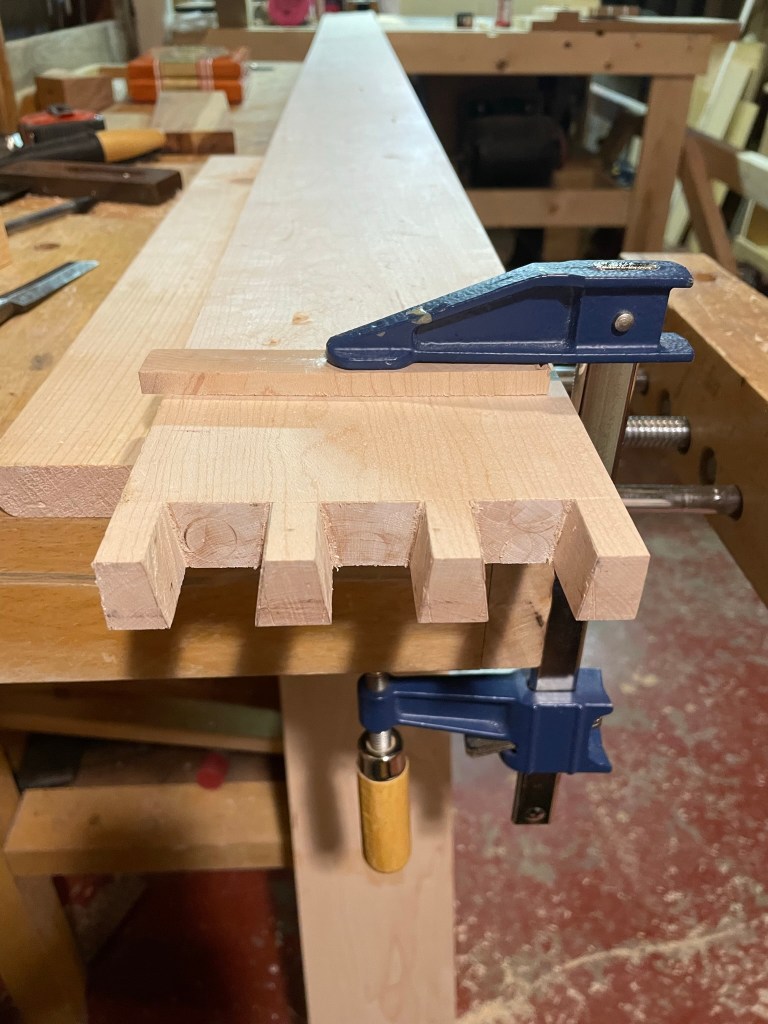
Onto the shell. I purchased two pieces of variable width 1x hard maple to wrap the top and two sides of the interior frame. The maple was a bit twisted along it’s length, but not so much that I could not work around it. The more wily of the two pieces I cut down to create the sides; the twist is much less noticeable over a shorter length. I planned to restrain the remaining twist by relying on the connection to the interior frame and on thru-dovetails at the corner of the top and side pieces of the shell. If instead I used a butt-joint and pocket screws at the shell corners, I think the pull-out strength of the screw would not prevent seasonal unsightly gaps in the joints.
I began tails-first, as usual, with ganged cuts in the side pieces. I have found that the joints come out consistently from corner to corner, and the ganged cut reduces work throughout a project. There are only two joints on this project, so there is not that much time-saving, but is it is a good work practice none the less.
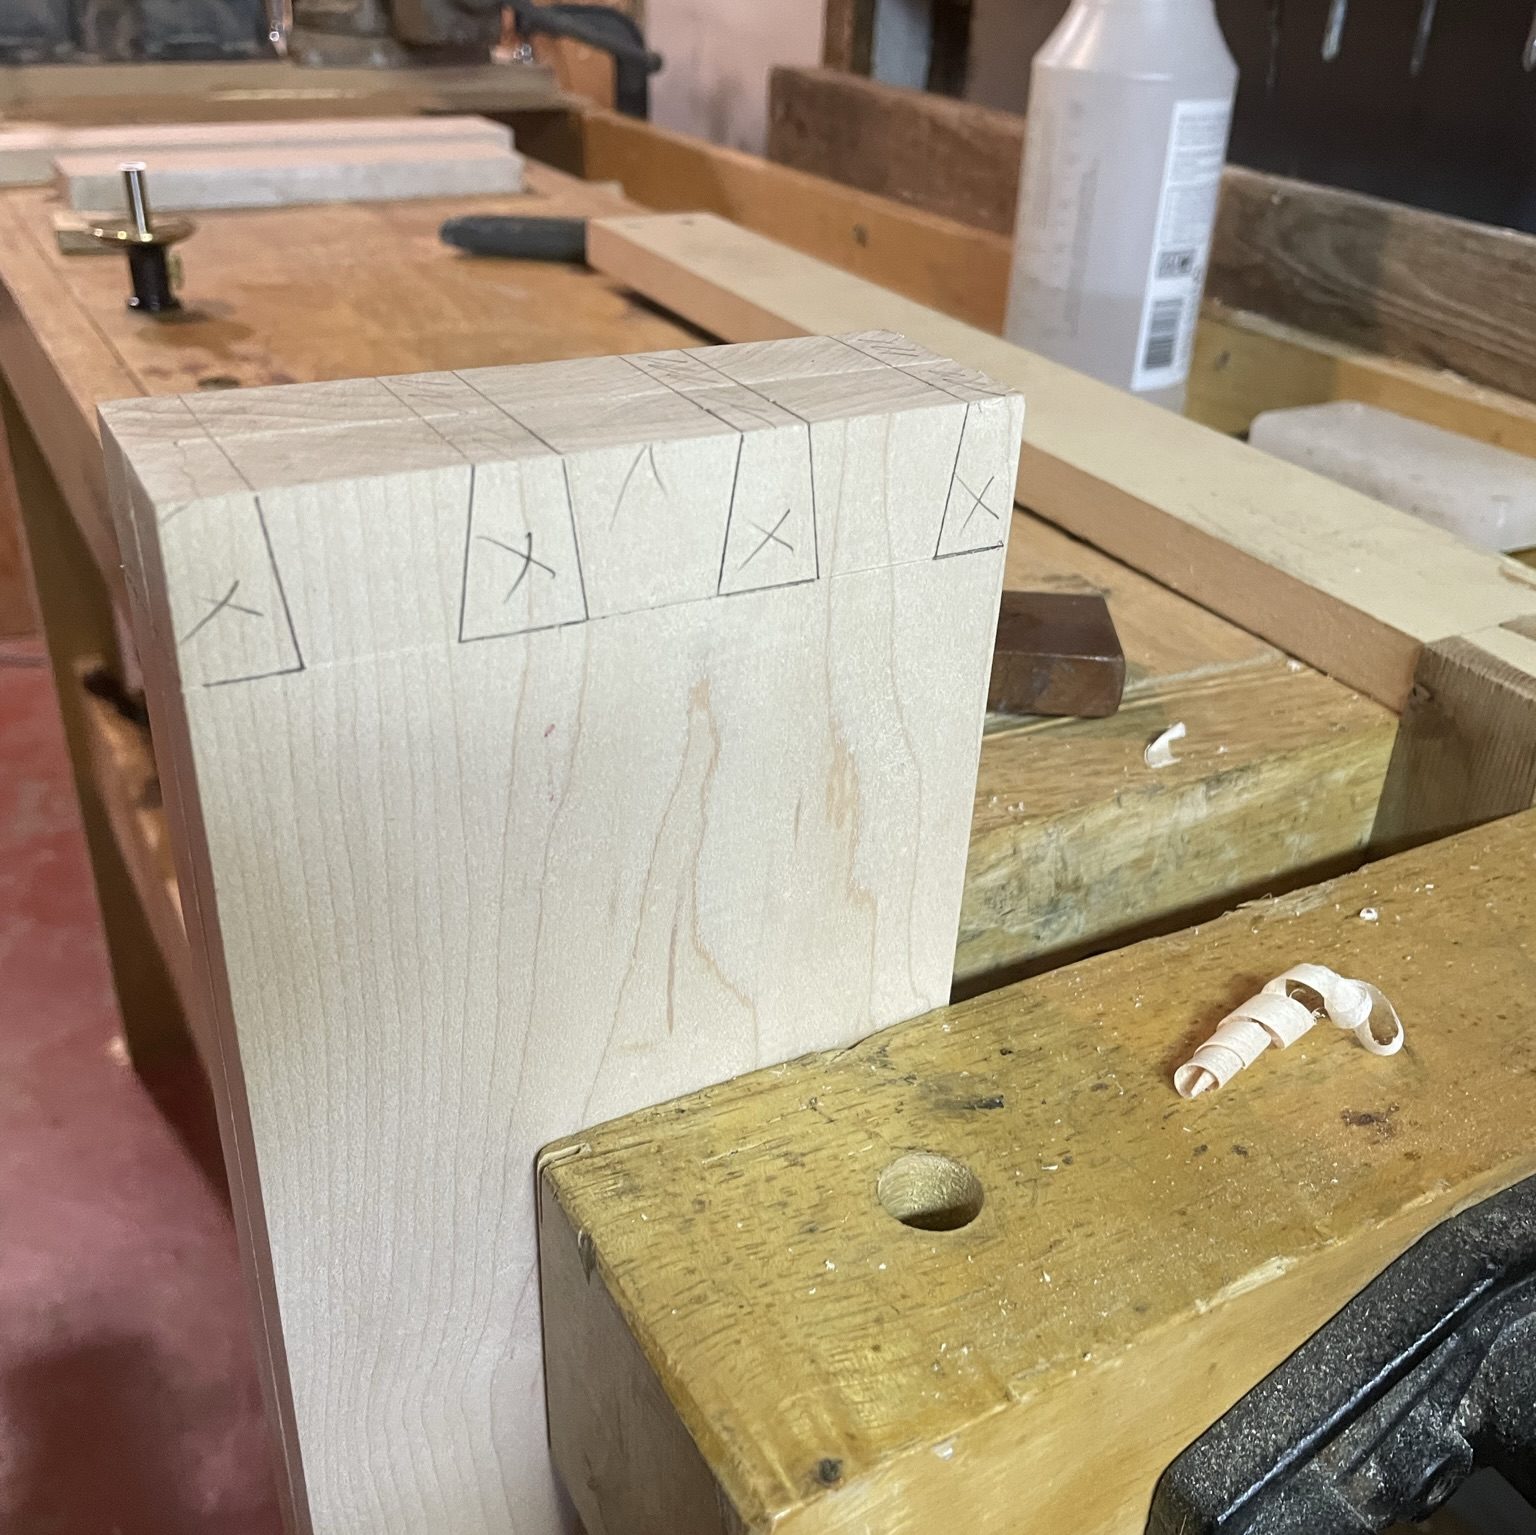
I mark out the tails with two sets of dividers and a sliding t-bevel. For repeatable and consistent spacing, one set of dividers sets the half-pins, and the others divider sets the tail+pin width by walking once each direction over the remainder of the board. For more information on this method of dovetail layout, check out this video with Megan Fitzpatrick at Lost Art Press. I shoot for about 14-degree tails, but this varies from project to project with my t-bevel set by eye. I clear the waste with a drill and chisels, chopping to the line.
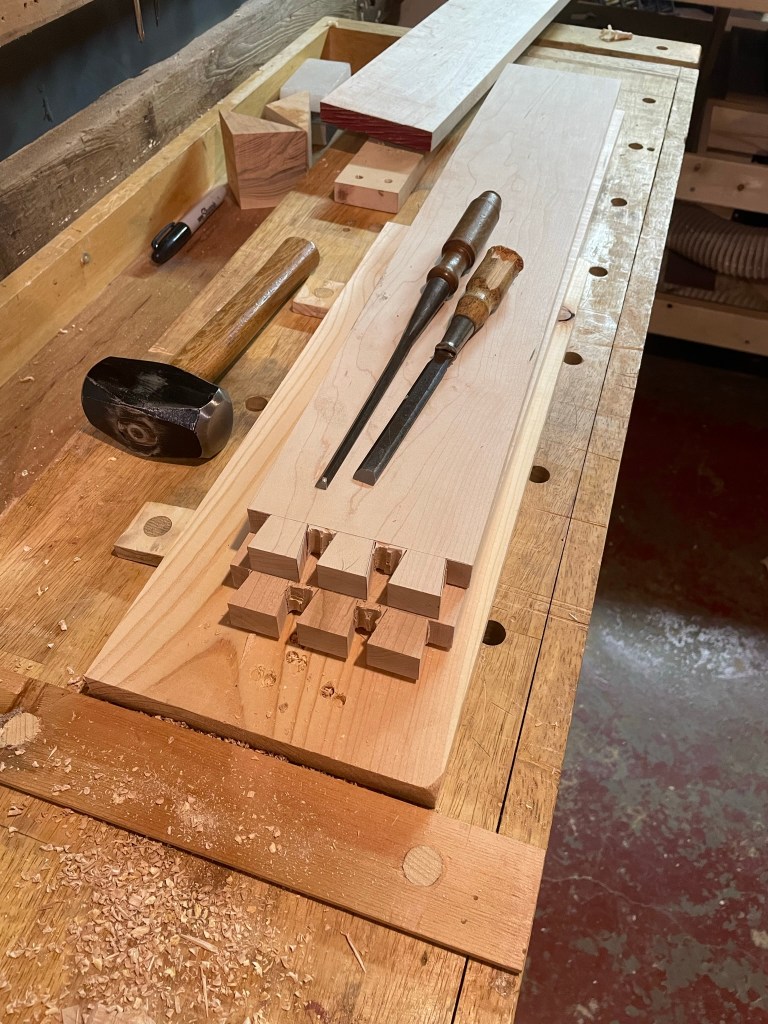
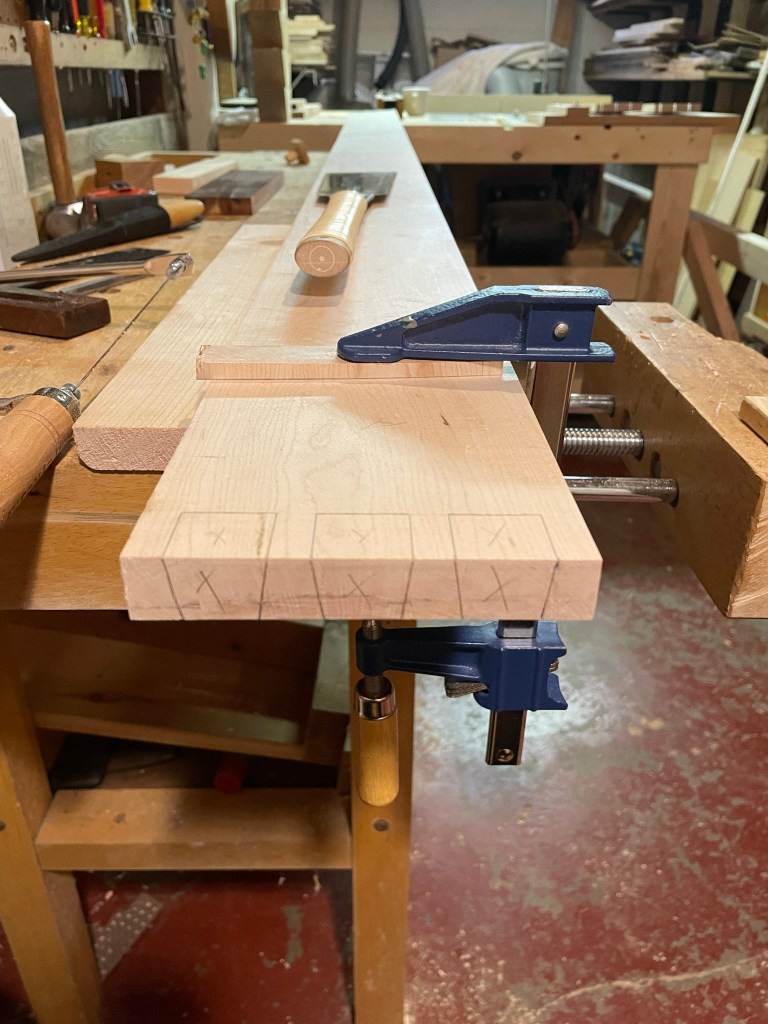
After clearing and cleaning up the tails, I transfer the marks to the ends of the pin boards. As usual, the wood/woodworker geometry precludes access to the pin cuts with the board on end. Here I return to base-camp at the end of the bench to clear the waste from the pins. Cut to the line. Cope the bulk. Route to the line. Clean as needed.

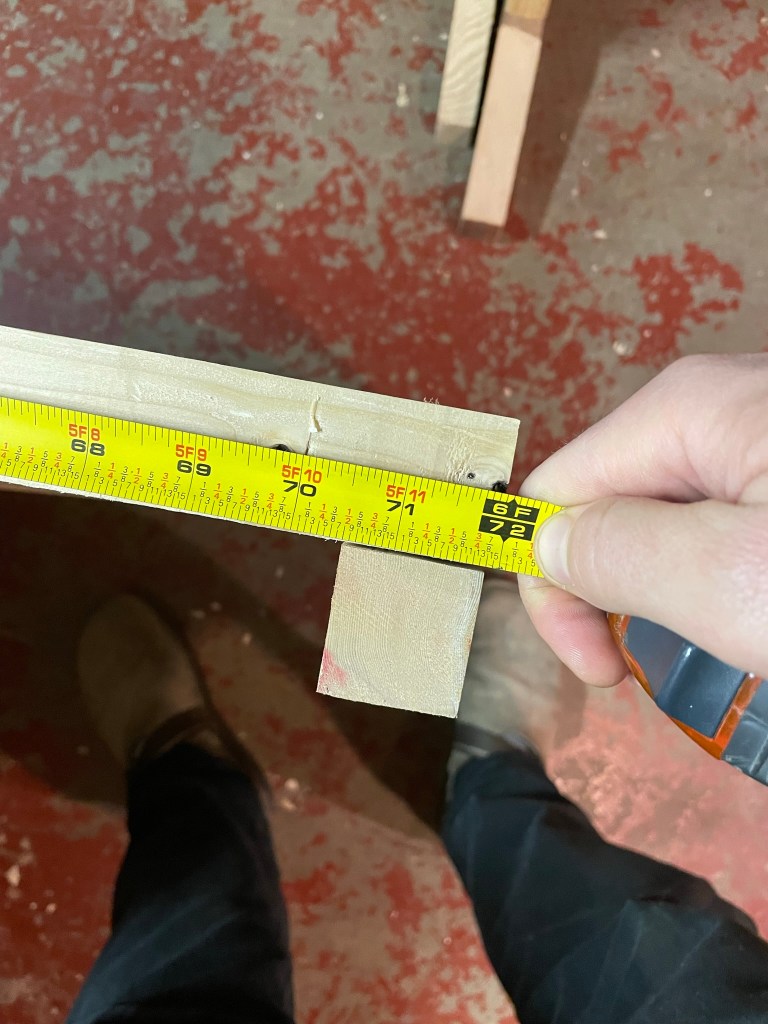
Assembly Time. I had built the interior frame several days before completing the shell. For much at that time, I would glance at the frame and think, ” That seems a bit short for the couch…”. I was right; the back of the couch is just proud of 7′-0″ from end to end (this point of pride will come back to haunt me). When I first made my marks for the frame stretchers, I think I covered the F and the 2 at the 6F/72″ mark on the tape. As a result, there was a 12″ gap between the end of the frame and the interior face of the maple shell. Smooth move, that one.

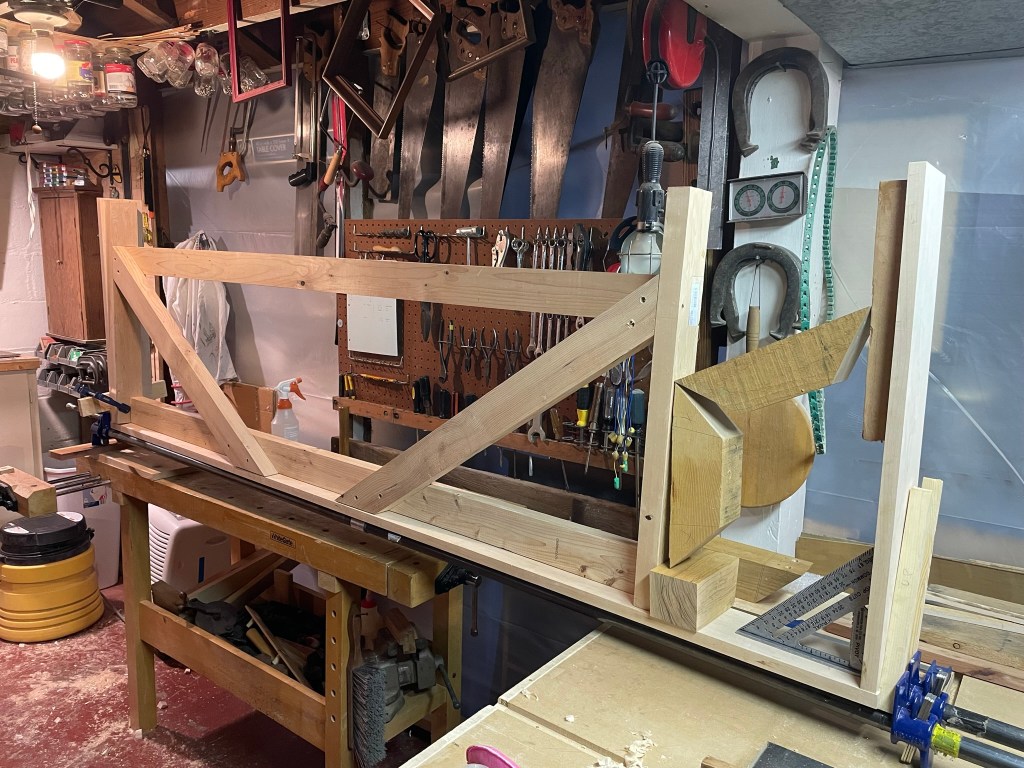
I used the resulting nightmare Tetris, and sculptural creativity, to pry the shell leg away from the interior frame in an effort to counter the slightly acute angle in the clamp face. This is normally not a problem for case construction, because the 4th side of the case holds the clamped faces equidistant, and (hopefully) close to square.
After the shell had dried, I disassembled the frame, cut two new stretchers (to the right length this time), and secured the shell to the frame with pocket screws around the back edge. Voilà!

In place, this will appear as just a wood ribbon at the back of the couch and could do with a dash of texture. I left the pins and tails to project about 1/8″ beyond the adjoined board to provide the needed relief and chamfered all the edges with a paring chisel. The remaining nodules are silky-smooth.

The whole shelf was designed to fit fully behind the couch and tight to the wall. After first moving it to the living room, we found the extra few inches noticeably shrunk the room.
To reduce the projection into the room, I decided to try to nest the back of the couch within the new shelf, gaining a few precious inches of floor space. Here is where that proud 7′-0″ bites me. Because of the earlier design choices, the shelf is just barely too short to fit around the couch interior frame, as in 1/4″ too short.
It’s a bummer.
One end of the couch now nests nicely within the shelf (the more visible end), and other end is pushed tight against the wall. Both the shelf and the couch are angled relative to the wall to maintain the appearance of parallel to the carpet and wall. It works in the end.

With a little more forethought and another couple of measurements, the hick-ups and final product could better fit the space. To nest the couch, I could splice an inlay in the middle of the top board, or trim the insides of each leg to gain that extra 1/4″. At this point I have done neither. It works as intended and I’ll leave it at that. We’ve been using this for about a week and enjoy the utility of the newly accessible receptacles. It’s a breeze to charge electronics and, as an added benefit, the room provided by the shelf allows the window curtains to hang freely behind the couch cushions.
This was another problem-solving project to address a need we had in the living room and provided some good lessons in planning, design, and to practice joinery. This is an easy project that can be adapted for any couch and offers a lot of utility for any home.
