
As many upper-Midwesters might, I have accumulated a small stockpile of old alpine skis ranging from classic Harts, to battered Dynastar rentals. Like any self-respecting thrifter, I’ve intended to use these free skis for something. As we move into grilling season, we’re finding we have a need for additional seating in the backyard. I could buy a few used lawn chairs, but why do that when I could could spend way more time and about the same amount of money making chairs by hand? As a hobby woodworker, the choice is obvious.
The Adirondack received their name in the 1830s from one Ebenezer Emmons, a geologist and mountain climber that is thought to have adapted the name from the Mohawk’s derogatory term for their neighboring Algonquins [link]. Adirondacks : eaters of trees, how fitting for an exercise in woodworking masochism.
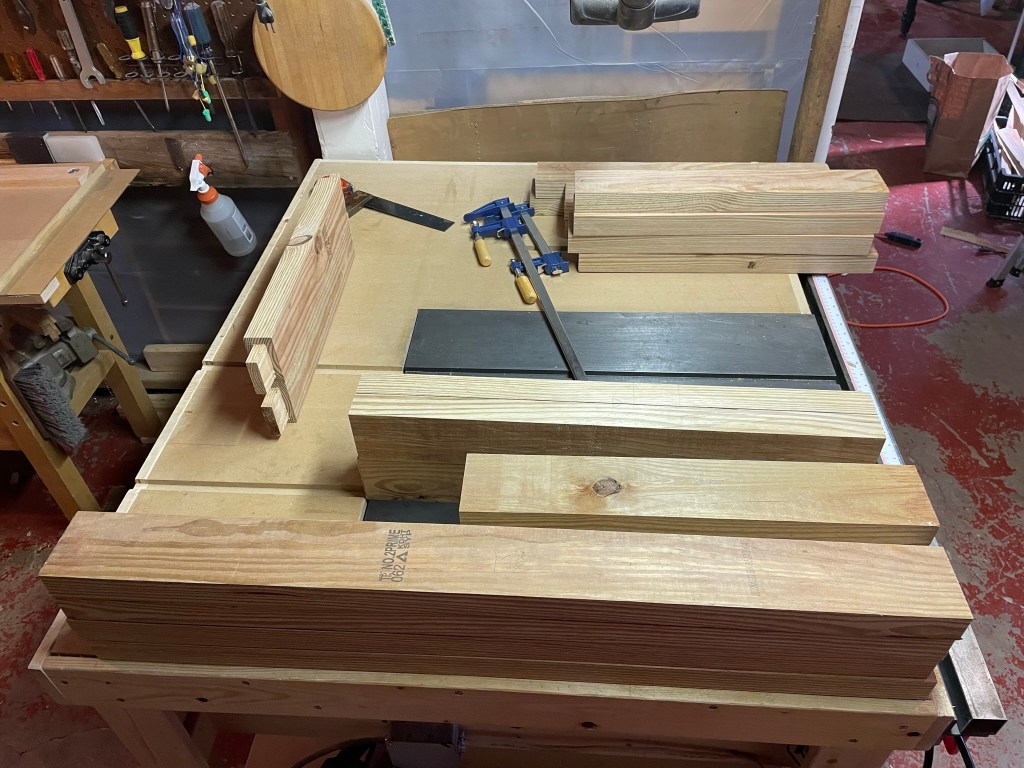
Start with the stock. Treated lumber tends to have a much higher moisture content than typical construction lumber, and especially properly air or kiln dried woods. So, before cutting the stock to rough lengths, I let the boards acclimate to the basement workshop. You can see the water wicking out the exposed ends of each of the freshly purchased boards. Progress.

After a couple of weeks of waiting for the boards to dry, it was time to begin breaking down the stock. I cut each a little bit long , both to allow some trimming to square as needed and to provide some flexibility as I work out the design as I move through the building process.
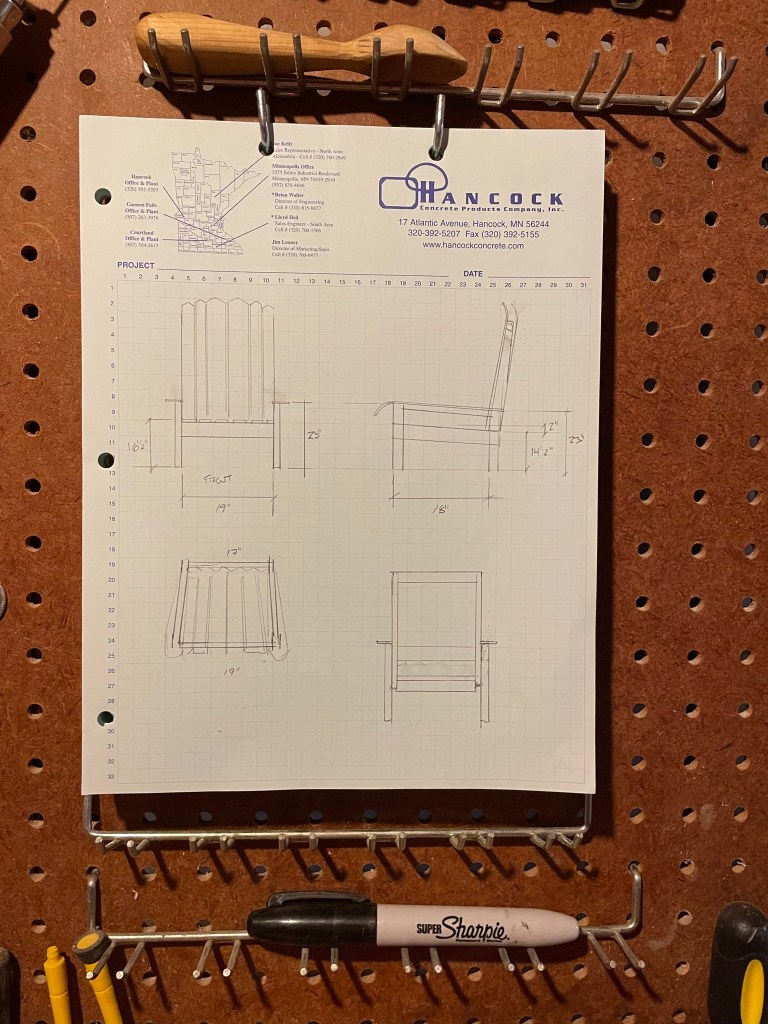
In lieu of typical screws and construction adhesive, I use these chairs as an exercise in mortise and tenon construction. As these will be primarily outdoor chairs, I expect they will experience all manner of bumps, racking, overturning, and weather. So, a few classic tenons can’t hurt.
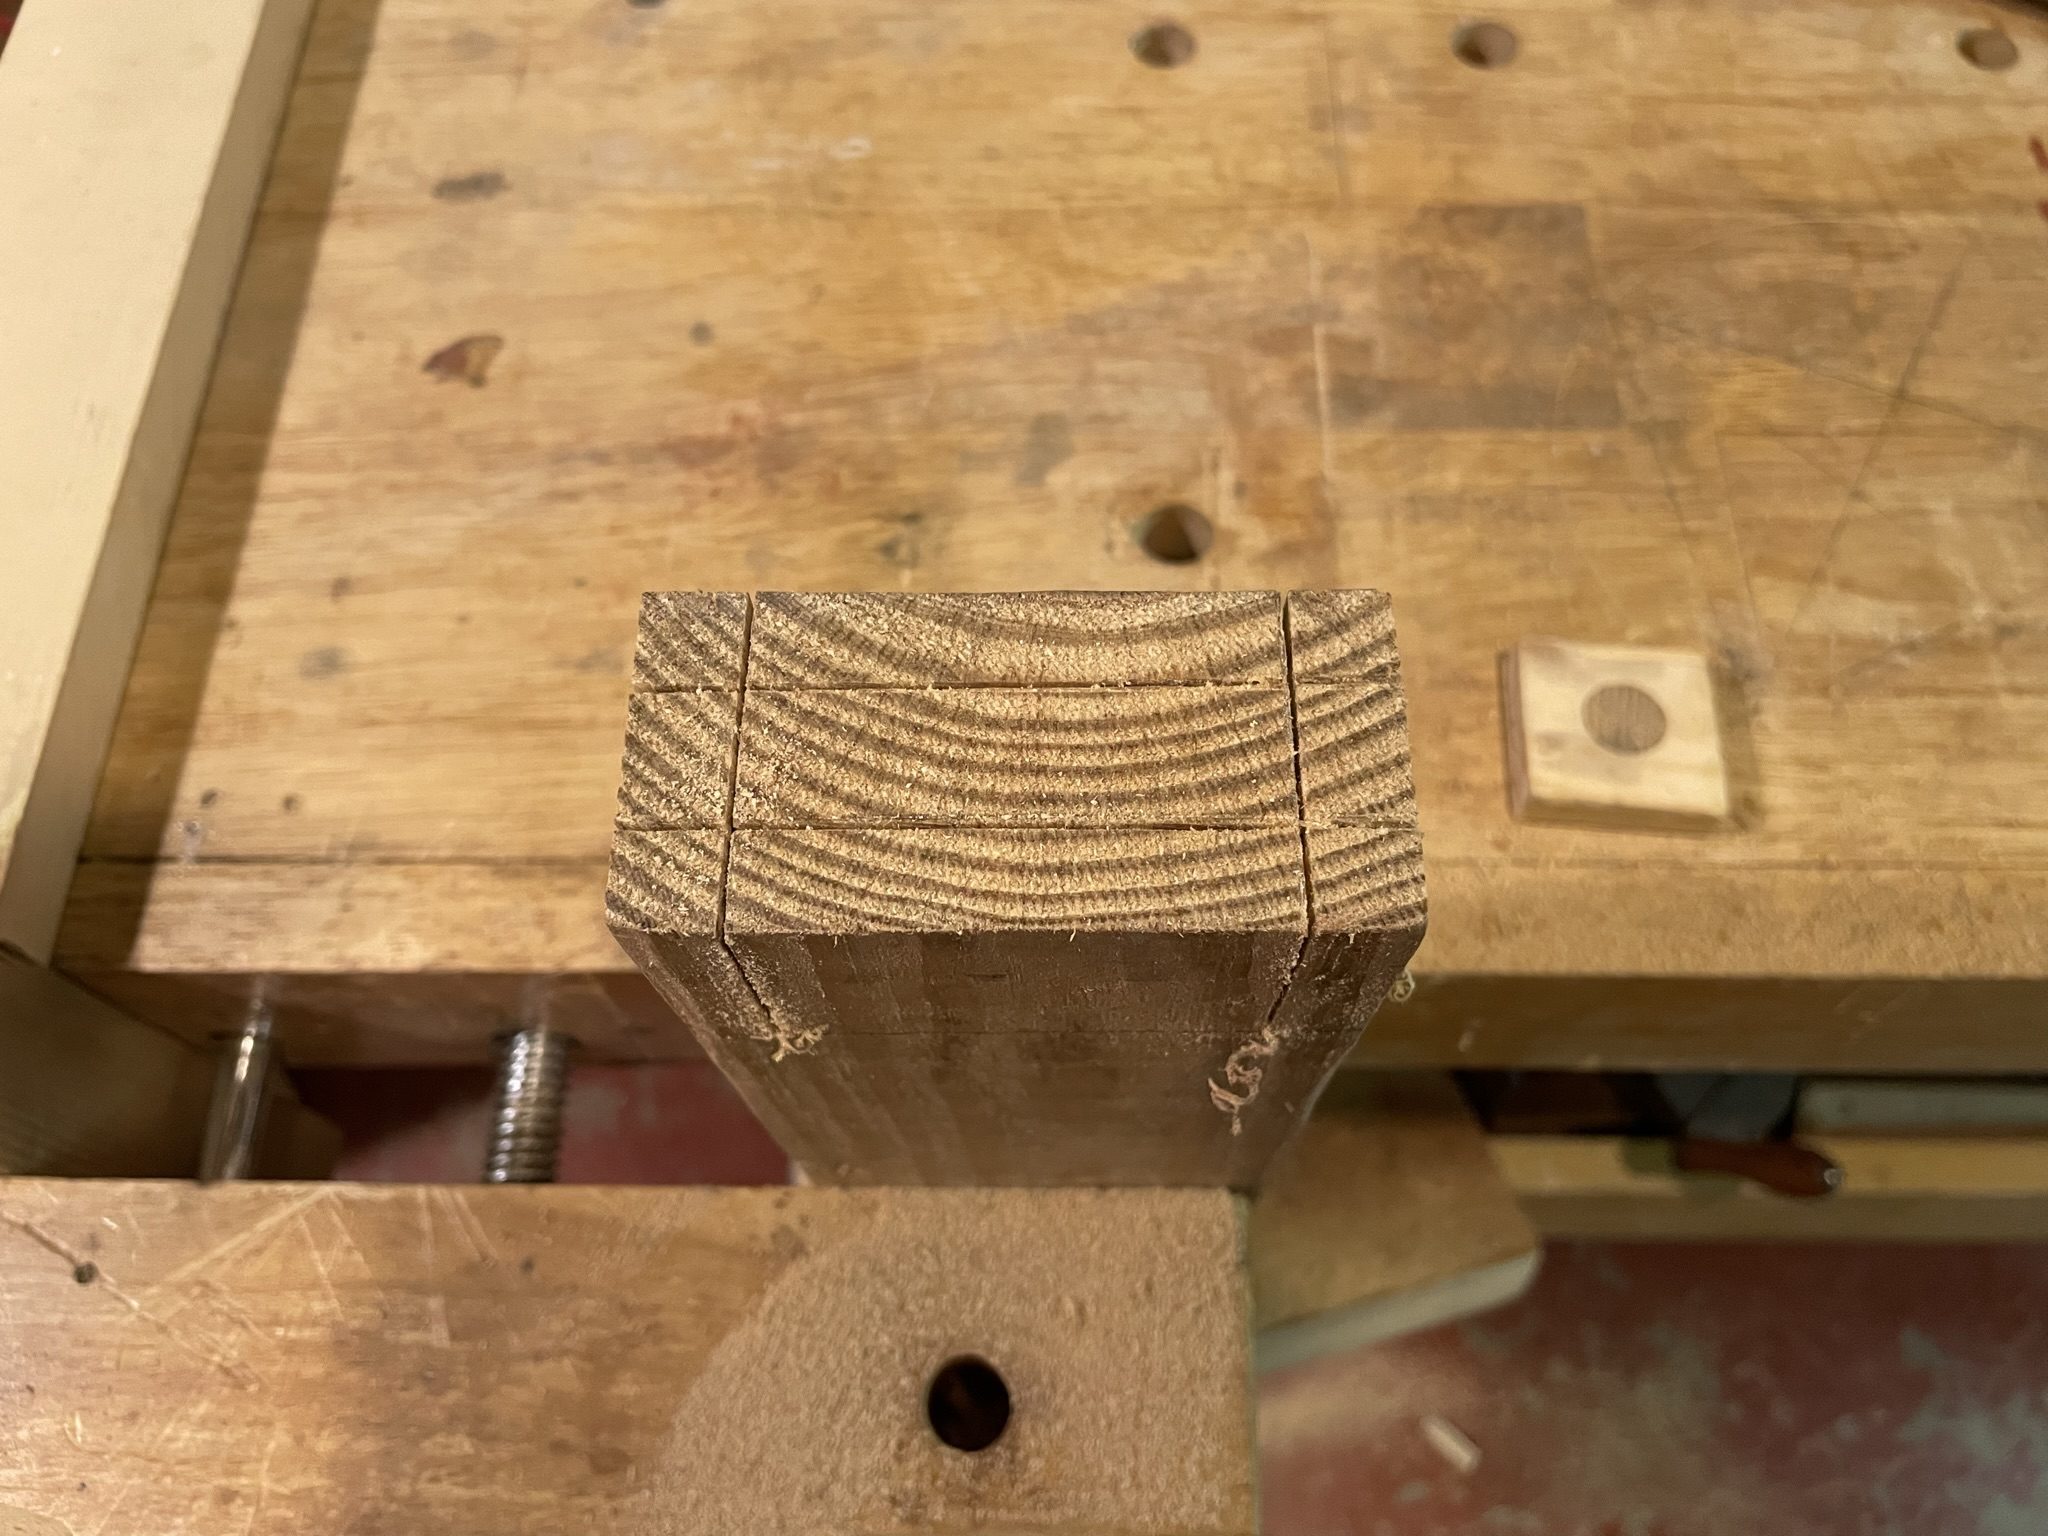
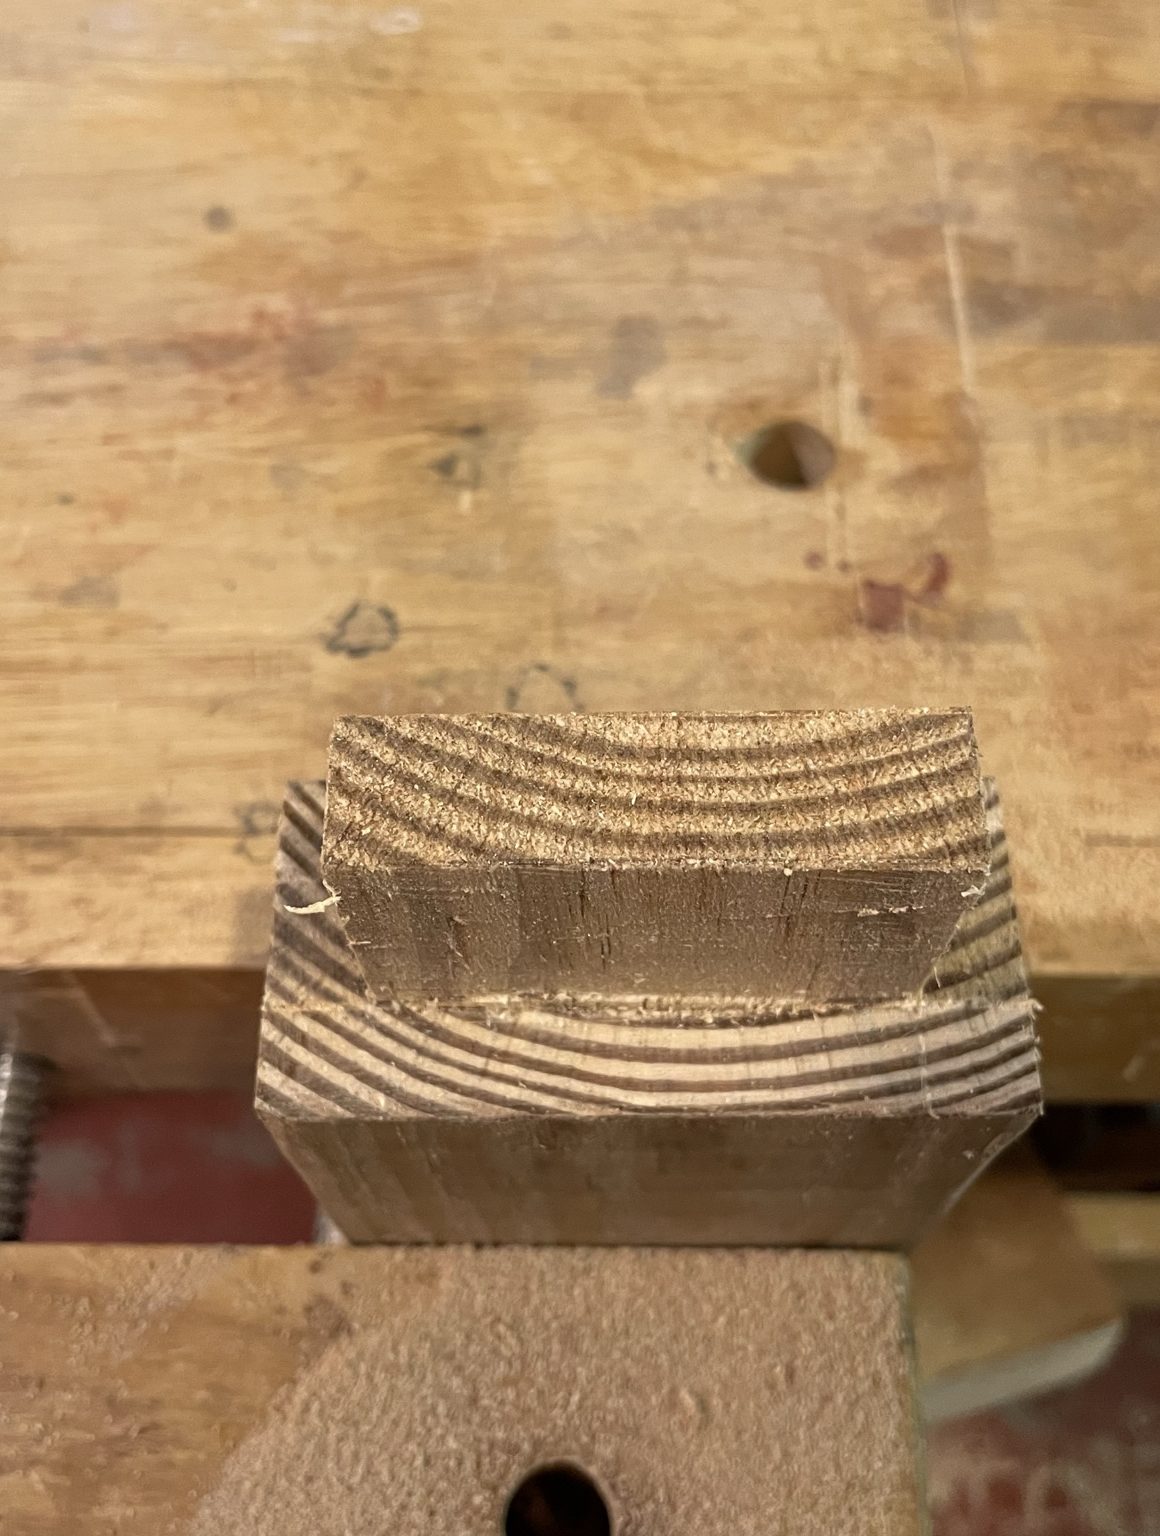
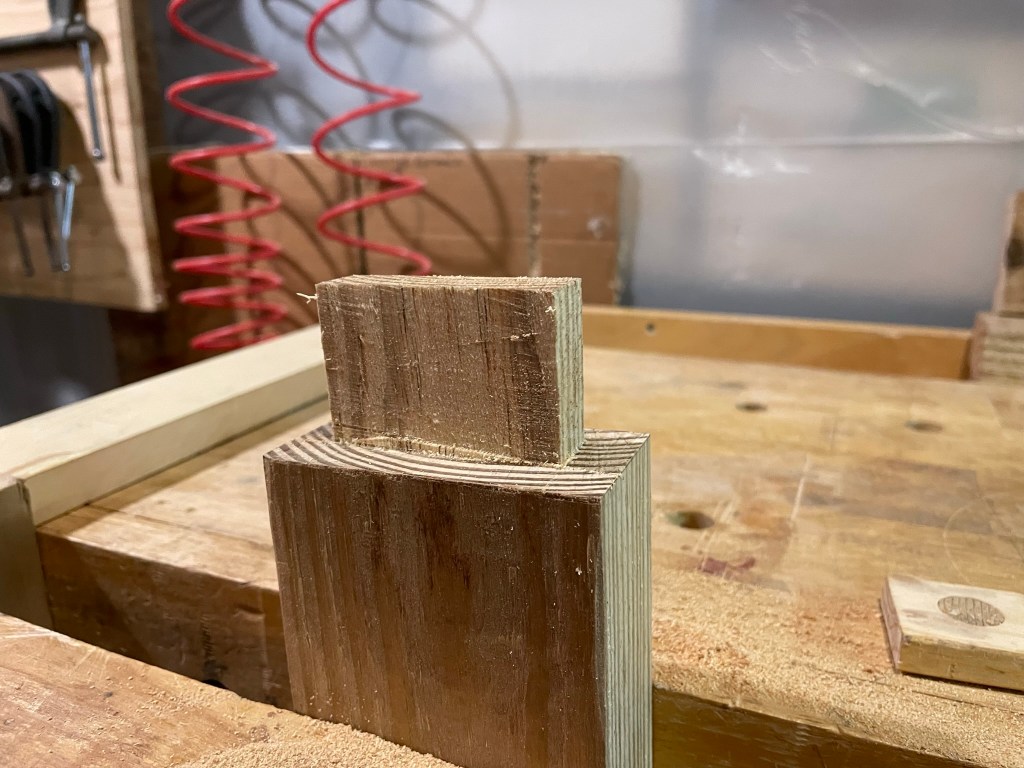
I marked, bored, and trimmed the mortises in the front and back legs before moving onto the tenons for the side rails. Rather than providing a continuous boarder of seat rails, I have placed the side rails parallel with the ground and about 4″ lower than the front and back seat rails.
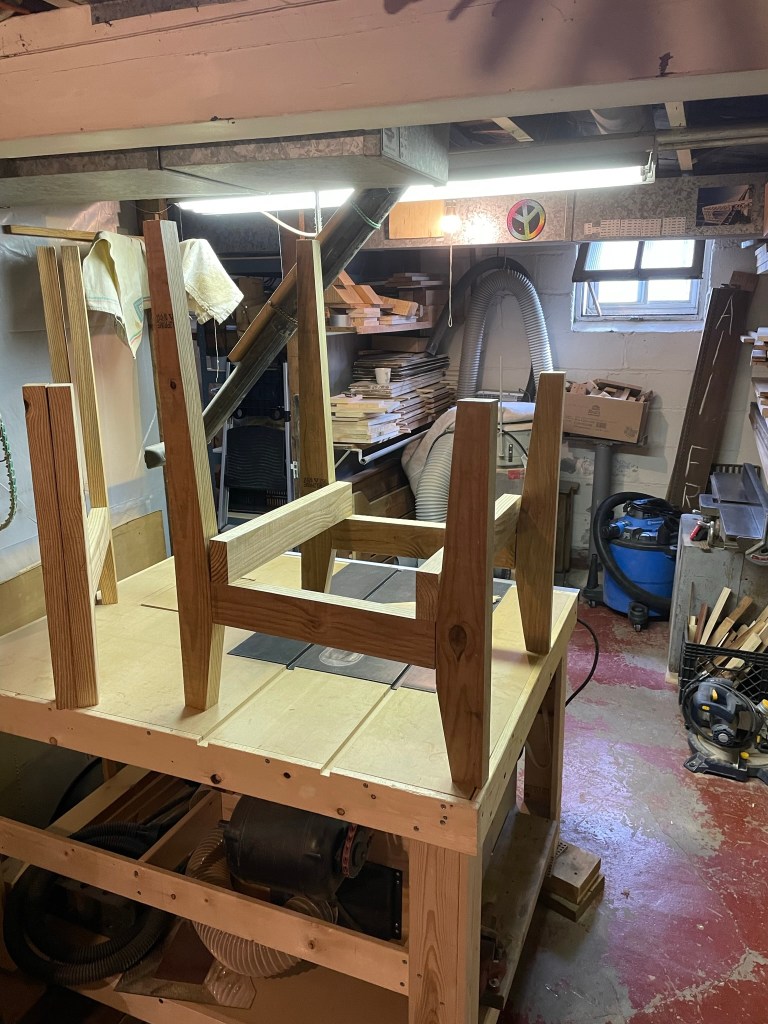
With the sides assembled, I can move on to the front and back seat rails. The sides of the chair splay slightly such that the front rail is about 1 1/2″ longer than the back chair. Here, I’ve elected to again use straight tenons in the rails, so the mortises in the front legs must be angled by 1/2 the degree of the total chair splay. This I plan to accomplish on the drill press using a temporary fence on a ramped auxiliary table clamped to the original drill press table.
Check back or subscribe for Part II of the Adirondack build.
Cover image by Elise Fine, Adirondacks in the Fog
